Installing a widespread faucet can transform your bathroom or kitchen sink, offering both functionality and a modern aesthetic. While the process might seem complex at first, you can complete it successfully with the right tools and clear instructions. This guide walks you through every step, provides a tool list, offers troubleshooting tips, and includes additional insights to ensure you understand the process from start to finish. Whether you’re new to DIY projects or have some experience, this article equips you with the knowledge to install a widespread faucet confidently.
What is a Widespread Faucet?
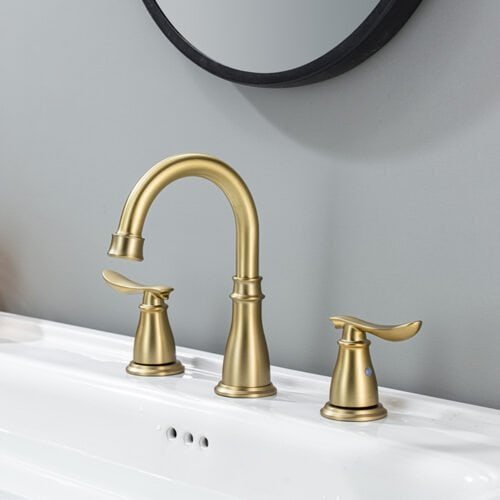
A widespread faucet features three separate components: a central spout and two handles for hot and cold water. Unlike single-hole or centerset faucets, widespread faucets require a sink with three pre-drilled holes, typically spaced 8 to 16 inches apart. This design suits larger sinks and provides a sleek, customizable look, making it a popular choice for modern homes.
Need a New Widespread Faucet?
If you’re looking to purchase a new widespread faucet, check out this detailed guide on choosing the best widespread faucet. It covers everything from key features to consider, such as material, finish, and water efficiency, to practical tips for matching your sink and style preferences.

Tools and Materials You’ll Need
Gather these tools and materials before you begin to ensure a smooth installation:
- Adjustable wrench: Loosens and tightens nuts and fittings.
- Basin wrench: Reaches tight spaces under the sink.
- Screwdriver (flathead and Phillips): Secures screwsiall in various hardware.
- Plumber’s tape (Teflon tape): Seals threaded connections to prevent leaks.
- Pipe wrench: Handles stubborn fittings (optional).
- Towels or rags: Cleans up water spills.
- Bucket: Catches dripping water.
- Flashlight: Illuminates dark areas under the sink.
- New widespread faucet kit: Includes the spout, handles, mounting hardware, and often a drain assembly.
- Y-connector (if included): Connects the main water supply to the hot and cold lines.
Pro Tip: Confirm that your faucet matches your sink’s hole spacing (8-16 inches) to avoid compatibility issues.

Step-by-Step Installation Guide
Follow these steps to install a widespread faucet» correctly:
Step 1: Turn Off the Water Supply
Locate the shut-off valves under your sink and turn them clockwise to stop the water flow. If your sink lacks shut-off valves, shut off the main water supply to your home. Open the old faucet to drain any remaining water and relieve pressure.
Step 2: Remove the Old Faucet
- Disconnect the water supply lines from the old faucet with an adjustable wrench.
- Use a basin wrench to loosen the nuts holding the faucet to the sink.
- Lift the old faucet and its hardware off the sink carefully.
- Wipe the sink surface clean, removing any old caulk, putty, or debris.
Note: If your old faucet has a pop-up drain, disconnect it by loosening the clevis screw and removing the lift rod.
Step 3: Prepare the Sink
Check that the sink’s three holes are clear of debris. If your new faucet includes a deck plate or escutcheon, position it over the holes for a polished appearance.
Step 4: Install the Faucet Spout
- Insert the spout into the center hole of the sink.
- Secure it from underneath with the provided mounting hardware, typically a rubber gasket, metal washer, and nut.
- Tighten the nut with a basin wrench until the spout feels firm, but stop before over-tightening.

Step 5: Install the Hot and Cold Handles
- Place the hot water handle in the left hole and the cold water handle in the right hole.
- Fasten each handle from below with the included washers and nuts.
- Tighten the nuts with a wrench to keep the handles steady.
Important: Conventionally, install the hot handle on the left and the cold on the right for user familiarity.

Step 6: Connect the Water Supply Lines
To install a widespread faucet, connect the water supply lines carefully, a critical step for ensuring proper function, as it ensures the hot and cold water flow correctly to the spout. Widespread faucets typically have separate supply lines for the hot and cold handles, which connect to the main water supply. Some models include a Y-connector to streamline the connection. Follow these detailed steps:
- Understand Your Setup:
- Check if your faucet kit includes a Y-connector, a fitting with one inlet and two outlets. The inlet connects to the main water supply valve, and the outlets connect to the hot and cold supply lines. This simplifies the plumbing, especially in tight spaces.
- If no Y-connector is provided, connect the hot and cold supply lines directly to their respective shut-off valves.
- Using a Y-Connector (If Included):
- Prepare the Y-Connector: Inspect the Y-connector to ensure it’s clean and undamaged. Wrap plumber’s tape (Teflon tape) clockwise around the inlet threads, covering them evenly with 2-3 layers to prevent leaks.
- Connect to the Main Supply Valve: Align the Y-connector’s inlet with the shut-off valve’s outlet. Hand-tighten it until snug, then use an adjustable wrench to turn it an additional 1/4 to 1/2 turn. Avoid over-tightening to prevent damaging the threads.
- Attach Hot and Cold Lines: Take the hot handle’s supply line and wrap its threaded end with plumber’s tape. Connect it to one of the Y-connector’s outlets (check for “H” or “C” markings or refer to the manual to ensure correct placement). Hand-tighten, then secure with a wrench. Repeat for the cold line, connecting it to the other outlet.
- Verify Connections: Gently tug each line to confirm they’re secure. Ensure the Y-connector is positioned to avoid interfering with other under-sink components.

- Without a Y-Connector:
- Prepare the Shut-Off Valves: Wrap plumber’s tape clockwise around the threads of the hot and cold shut-off valves, covering them with 2-3 layers.
- Connect the Hot Line: Align the hot handle’s supply line with the hot water shut-off valve (typically on the left). Hand-tighten the connection, then use an adjustable wrench to secure it with an additional 1/4 to 1/2 turn.
- Connect the Cold Line: Repeat the process for the cold handle’s supply line, connecting it to the cold water shut-off valve (typically on the right).
- Check for Alignment: Ensure both lines are straight and not twisted to maintain optimal water flow.

- Inspect the Layout:
- Confirm that the supply lines extend smoothly without kinks or sharp bends, which could restrict water flow or cause wear over time.
- If a line is too long, loosely coil it under the sink, ensuring it doesn’t tangle or obstruct other components.
- If using a Y-connector, verify it’s stable and not wobbling, as movement could loosen connections.
Pro Tip: Wrap a cloth around metal fittings when using a wrench to avoid scratching or damaging the finish. If leaks occur after testing, shut off the water, reapply plumber’s tape, and tighten the connection slightly.
Step 7: Install the Drain Assembly (If Included)
- Follow the manufacturer’s instructions to install the pop-up drain, if provided.
- Connect the lift rod to the clevis strap and secure it with the clevis screw.
- Test the drain by moving the lift rod up and down to confirm smooth operation.
Step 8: Test for Leaks and Functionality
After installing the faucet, ensure it operates correctly and is free of leaks by following these steps:
- Remove the Aerator: Unscrew the aerator from the faucet spout (usually by hand or with a wrench, depending on the model). This prevents debris from clogging the aerator during initial testing.
- Open the Shut-Off Valves: Turn the shut-off valves counterclockwise slowly to restore water flow. Open them fully to ensure proper pressure.
- Flush the Faucet: Turn on the faucet handle and let water run for one minute to flush out debris from the faucet and supply lines. This step clears any sediment or particles that may have entered during installation.
- Inspect for Leaks: Check all connections for leaks, including under the sink, around the spout, handles, and Y-connector (if used). Look closely at the supply line connections and mounting hardware.
- Test Handle Functionality: Operate the hot and cold handles to verify they control water flow and temperature correctly. Ensure smooth operation without sticking.
- Reassemble the Aerator: Close the faucet handle, then screw the aerator back onto the spout. Hand-tighten it or use a wrench gently to avoid damaging the finish.
- Final Leak Check: Run the faucet again briefly to confirm the aerator is secure and no leaks occur.

Pro Tip: Keep a bucket or towel handy under the sink during testing to catch any drips. If you notice minor leaks, tighten the affected connection slightly or reapply plumber’s tape.
Troubleshooting Common Issues
If problems arise, use these solutions to fix them:
- Leak at the Spout or Handle Base: Tighten the mounting nuts a bit more. If the leak continues, ensure the O-rings or gaskets sit properly.
- Low Water Pressure: Remove and clean the aerator to clear debris. If pressure stays low, confirm the shut-off valves are fully open.
- Loose Handles: Tighten the screws or nuts holding the handles. Replace worn washers or cartridges if the issue persists.
- Leak at the Y-Connector or Supply Lines: Shut off the water, reapply plumber’s tape, and tighten connections. Replace damaged components if needed.
- Drain Malfunction: Adjust the clevis screw on the lift rod until the pop-up drain moves freely.
How to Choose the Right Widespread Faucet
Picking the perfect widespread faucet» enhances both performance and style. Consider these factors:
- Hole Spacing: Measure your sink’s hole distance (8-16 inches) to ensure a proper fit.
- Material and Finish: Opt for durable options like brass or stainless steel. Finishes like chrome, brushed nickel, or oil-rubbed bronze add flair.
- Valve Type: Choose ceramic disc valves for longevity and low maintenance over compression valves.
- Water Efficiency: Select a WaterSense-labeled faucet to conserve water without losing pressure.
- Style and Features: Decide between traditional or modern designs, and consider extras like touchless operation or a pull-down sprayer.

Premium 3-hole widespread faucet with dual handle | B1007 04

Right angle widespread faucet with dual stepped handle | B1006A 04

Brass dual knurled handle right angle faucet | B1006 04

Right angle widespread faucet with vertical lines handle | B1003 04

Mid-arc Conical base faucet with 2 handle | B819 04

8 in. tapered square bases widespread tap | B818 04
Brushed gold widespread faucet with classic handle | B817 04

Right angle 3-hole bathroom taps with handle | B815 04


Conclusion
To install a widespread faucet is a rewarding DIY task that elevates your sink’s look and functionality. This guide provides everything you need—step-by-step instructions, troubleshooting advice, and selection tips—to complete the job with confidence. Take your time, use the right tools, and enjoy the savings and satisfaction of doing it yourself.